Introduction
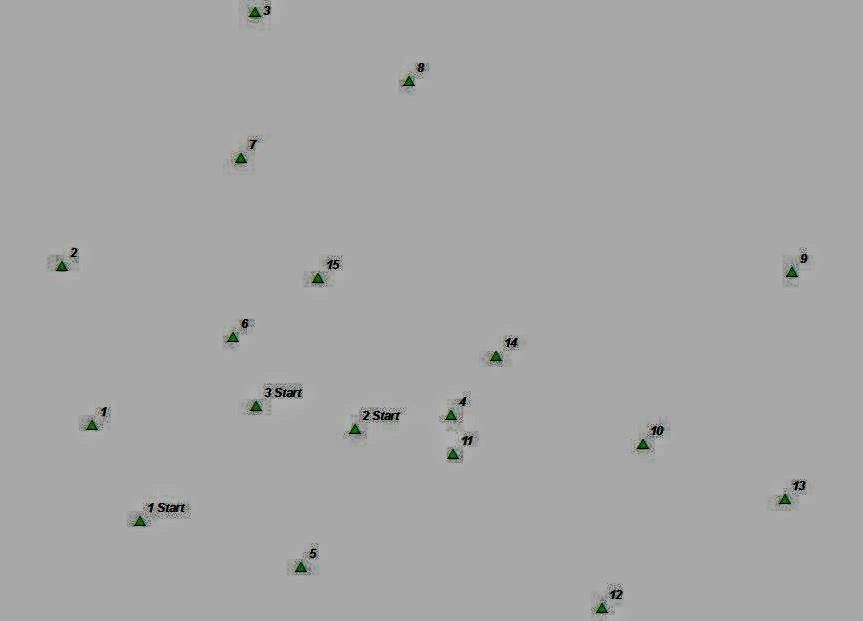
This will be the final blog in the three part Priory navigation series. The first two exercises focused on traditional navigation (orienteering post) using map and compass. Considerable effort was focused on map production (map construction post) and elements essential to orienteering. Now that the orienteering exercise is complete, a comparative example with the modern technology of GPS will be used for navigation. Again it will be a race against the other 6 groups in this Field Methods class to finish the course.There will be exceptions to this exercise. The previous exercise only required each group to navigate one of the five point courses, this time each group will navigate all three courses, 15 flags in total. In addition to navigating the entire orienteering course, there will be an added element of stress. To simulate high pressure deadlines and other daily stressors of real world career jobs, each group member will be given paintball guns. Since the main goal is a race to the finish, if you are hit you must stop for one minute. The only other rules require each group to carry a GPS and collect a point at each flag showing they made it to all the course flags.
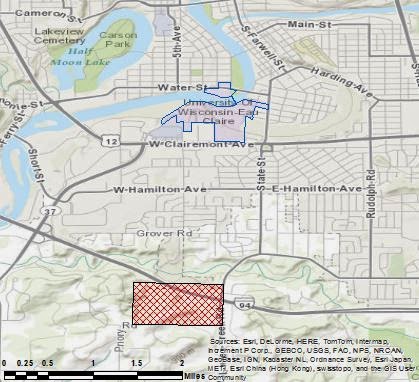
Once again the course will be located at the Priory, shown by the red polygon in figure 1. A 112-acre parcel of land located 2 miles south of the University of Wisconsin - Eau Claire campus. The Priory consist of three buildings which host the UWEC childcare center and act as a dormitory for students during the school year. These buildings will be off limits during the exercise and designated as "no shooting zones." For liability reasons the students were told to stick to the trees and avoid the open areas at all costs. Even though the staff were informed of the situation, there was no reason to push the envelope on this situation. The actual orienteering course itself surrounds the buildings in the heavily wooded areas. Mostly consisting of deciduous trees, thick underbrush, and a group of pine trees on the eastern portion of the course.
Requirements for the Exercise:
1) No shooting or walking through the "no shooting zones"
2) No shooting at anyone without a mask on
3) Start at your assigned starting point (1, 2, or 3)
4) Travel to your assigned first point before all other points.
*The starting point and first point collected were assigned in order to disperse the groups around the course initially, increasing the chance of encounters later in the exercise.
Methods
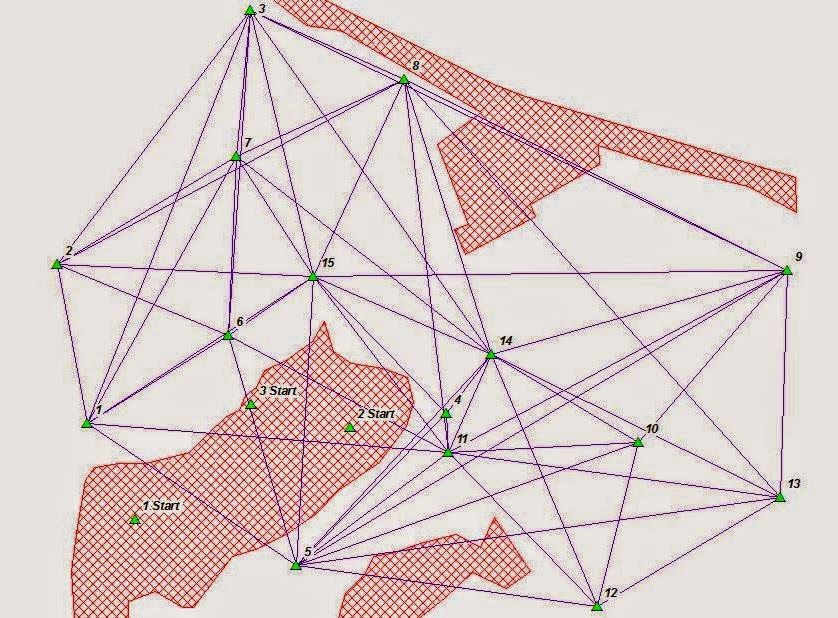
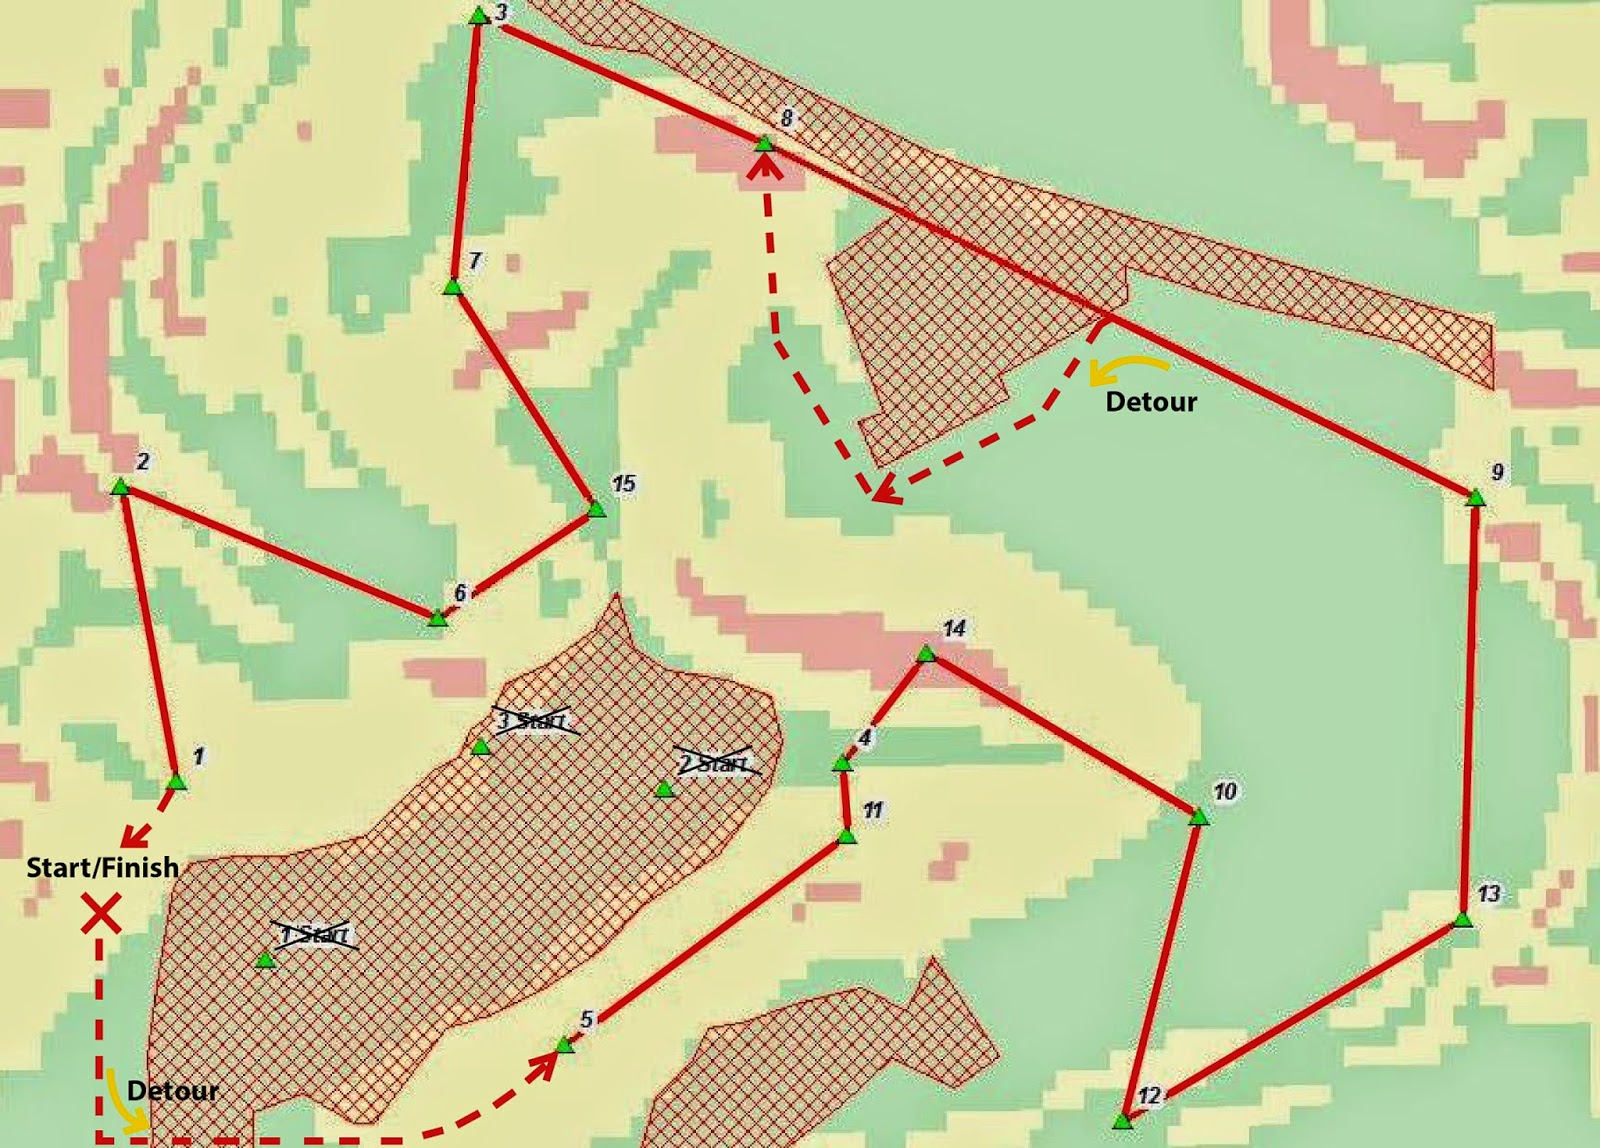
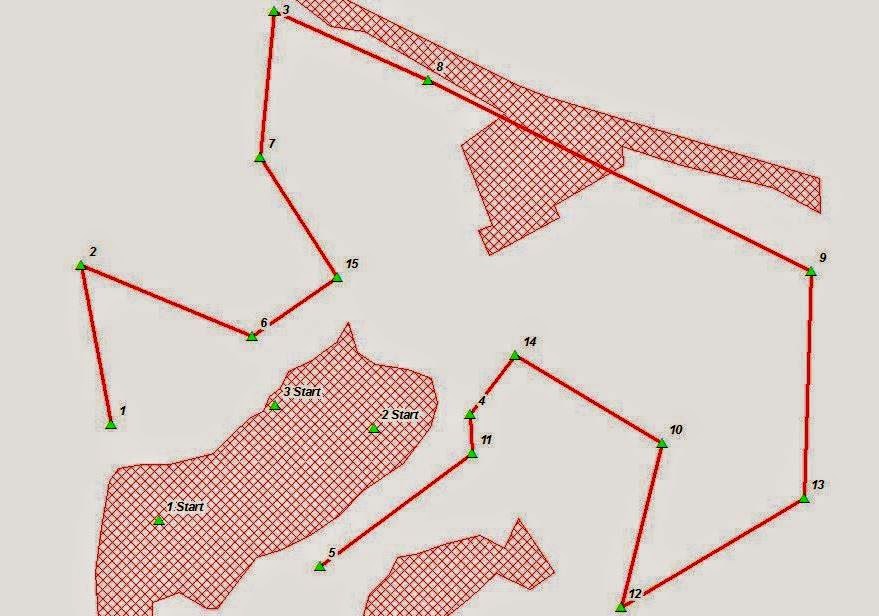
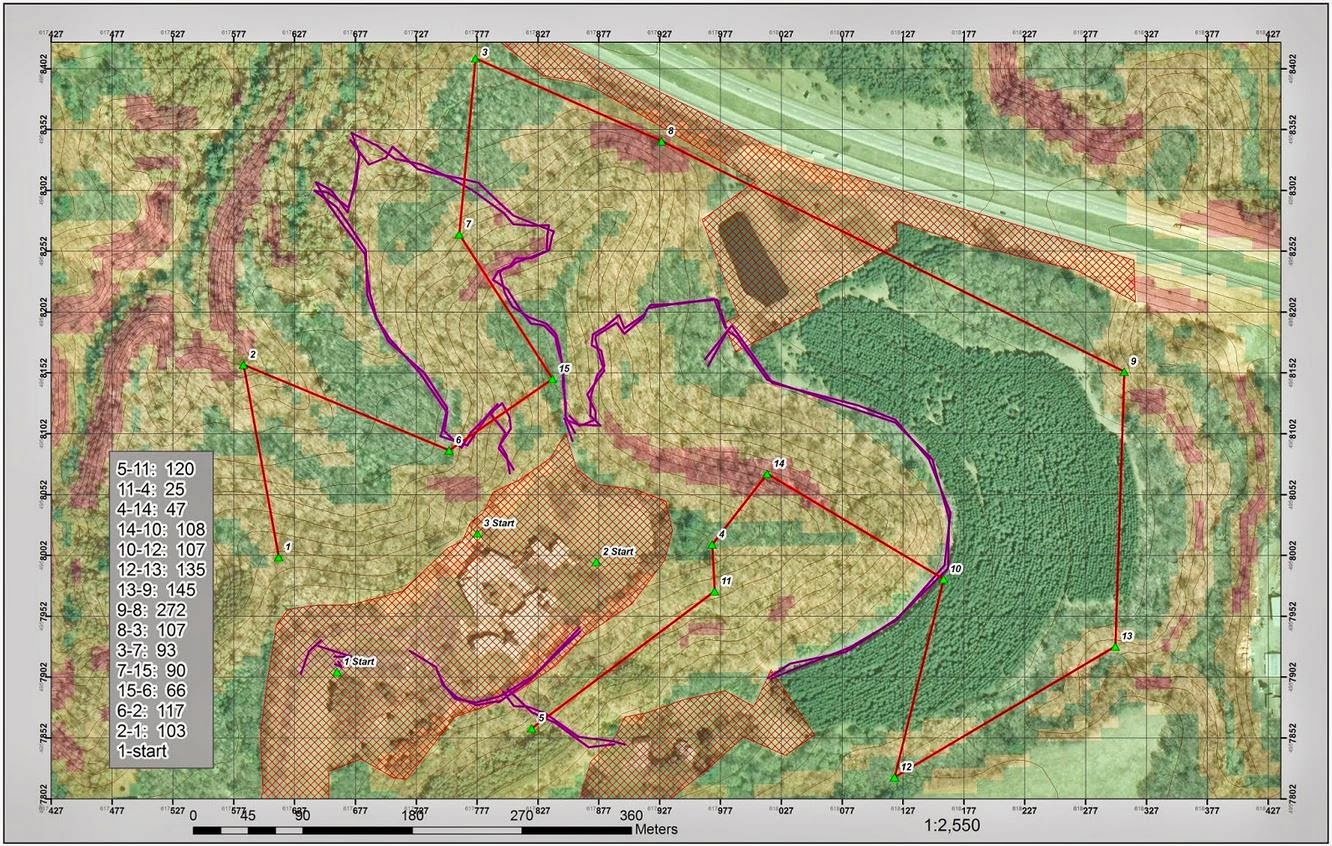
After completion of the orienteering course it was an immediate realization how the terrain was a major factor in navigating. With this in mind, the planning for this GPS navigation exercise was much more extensive. As a group we spent three hours weighing the pros and cons of taking certain paths. Questions such as, which type of trees would be quickest to travel through? Would it be quicker to run along a ridge slightly out of the way, or go up and over the hill instead? All these parameters were layed out before we started making a map. We wanted to know what to look for before we started making hasty decisions.Next we had to develop a network to connect the points. Devise a rudimentary system to narrow down which routes were plausible and eliminate those illogical. To do this we digitized connecting lines from flag to flag. Since some routes were obvious choices not to take, these were omitted from the digitizing phase. Figure 3 shows the results of the digitizing phase.
Once we created the slope model, we then reclassified the feature class for better planning purposes. The reclass had three categories: low, medium, and high slope values. When planning the route we tried our best to stay out of the red areas, or areas of high slope. Even if we weren't traveling up the slopes, most of the trees were still difficult to walk through, especially the northwest quarter of the map, there was a lot of underbrush here.
Discussion
Since we only deployed the path we were going to follow and the points we were very dependent on the GPS. For the most part the GPS performed better than I expected. However, there were times when the GPS would start jumping around all over the place and ultimately end in unknown space. To fix this we backed out of ArcPad and reopened the file. It was a pain to stop and wait for the file to load again, but there was nothing else we could do. After completion of the exercise we talked to the other groups and they had similar issues.The most significant complication during the race was the paintball equipment. Running around on a 70 degree day with a 25 lb. gun and a mask was not ideal. The mask kept fogging up and clouding your vision. This only made you more anxious because you couldn't see and you thought you were going to get shot. Right around this time the GPS would start to bounce all over the place and when you were trying to fix the GPS you couldn't see anything. Being stressed was definitely part of the exercise. Whenever this would happen we would have two people post up on opposite sides to watch for opposing teams. Then the GPS person would kneel down and try to fix the problem. This was important because it helped everyone relax. It meant we weren't going to be running anywhere soon and the tension would clear the air. It was little examples like this for why I thought our group worked together. Nobody panicked, we just dealt with the cards we were given and moved on.
In conclusion of which method was easier, the GPS or the map/compass, I would hands down say the GPS was easier. With the GPS you could walk off path and easily walk back to the line on screen. Sometimes the GPS was slow to pick up on the direction of travel, but we never walked more then 20 meters in the wrong direction. With the map/compass when you walked off course you lost the bearing, and getting off track was much easier than I initial anticipated. Often times you would have to stop and find yourself on the map. Two times we had find a new bearing and backtrack to where we thought the point was. Although with the map and compass navigation we didn't have a feature class for the flag locations either, that would have likely made navigating more precise and consequently easier.
Conclusion
We were inside on this day, and the activity was pushed to the 5th. Yes, you can combine what you did in the lab with the event. In fact, it was almost good that you had this day as you should really stress on the planning, and what the actual outcome was. Make sure you discuss if the GPS made navigation faster, or if the technology had it's faults such as turning off, losing satellites, etc.This final GPS navigation exercise was a very effective exercise to wrap up the field methods class. It could be said that the class just went out and shot paintball guns, but the lab was so much more than that. The day in the lab was used to get the students to think outside of the box to create the most efficient path through the variable terrain. This excited the students and created interest in the subject. Between classes each group had the responsibility of checking out and deploying their maps to their individual GPSs. Once out in the field the heightened anxiety of getting shot showed who could concentrate under pressure and still perform their duties. In the end we all had a blast, learned a lot about navigating with both traditional and modern methods, and increased our love of geography.
No comments:
Post a Comment