Introduction
Navigating during field work is of the utmost importance. Whether you are surveying the land for a future building or trekking through the forest on vacation, knowing your location is important. With the invention of GPS, navigation has become increasingly simple, to the point where novice navigators can rely on the GPS to take them wherever they need to be. The problem with this heavy dependence on technology is when it fails. Even a top of the line GPS will give extremely inaccurate data or fail altogether in thick foliage, in/and around buildings, hilly regions, etc.. This is why the effective use of map and compass becomes so important. With this idea of 'low tech' skills, this lab will focus on designing an effective map for navigating a UW-Eau Claire property just south the campus.The navigation of the course will be two part. The first excursion will be a race to see which group, of three, can complete the course the fastest using only a map and compass. The second day on the course will have the same goal, but each member of the group will be equipped with a GPS and paintball guns. If hit, the group will have to pause for 30 seconds before they can continue on in their navigation. This will test the diligence of the group and the quick thinking navigation in the event of obstacles.
Just like loading a data dictionary in a GPS, too much information on a map will slow you down. Added elements will make essential elements difficult to interpret; and, a constant coverage of ink on the map, maybe from an aerial photo, will make field notes difficult to add. In order to make the best map careful thought about the exercise was needed.
Since we will be using pace count--a technique of counting steps and interpolating the number of those steps to a distance, usually a standard number of steps per 100 meters-- to measure our distance, it will be important to know the topology of the area. Specifically, knowing where steep hillsides are, if there are lowland areas which could create swampy conditions during the winter thaw, etc. Other factors that would be helpful would be landmarks. These landmarks could be used to orient yourself with the proper azimuth calculations. Unfortunately, there are only a couple buildings on the property, and there will be dense foliage blocking these buildings from view. For this purpose I chose to exclude buildings from my map in order to cut down the the clutter. In the end I chose to include:
- 5 meter Contour Lines, with labels
- Navigational Boundaries
- No shooting zones
- Flag Boundaries
- Roads
- A grid overlay (added in layout view)
The final requirement is unique to this exercise. In order to familiarize ourselves with different units and coordinate systems, the professor made a requirement that we use a grid based off meters and another off decimal degrees. The map with the meter grid will be projected using the UTM coordinate system while the other will be projected using the Geographic Coordinate System. Shown below in figure 1, the Universal Transverse Mercator coordinate system (UTM) divides the earth into 60 zones, each in six-degree bands of longitude. It is projected using a transverse Mercator projection. The Geographic Coordinate System is based off of a spherical representation and uses latitude and longitude for location purposes.
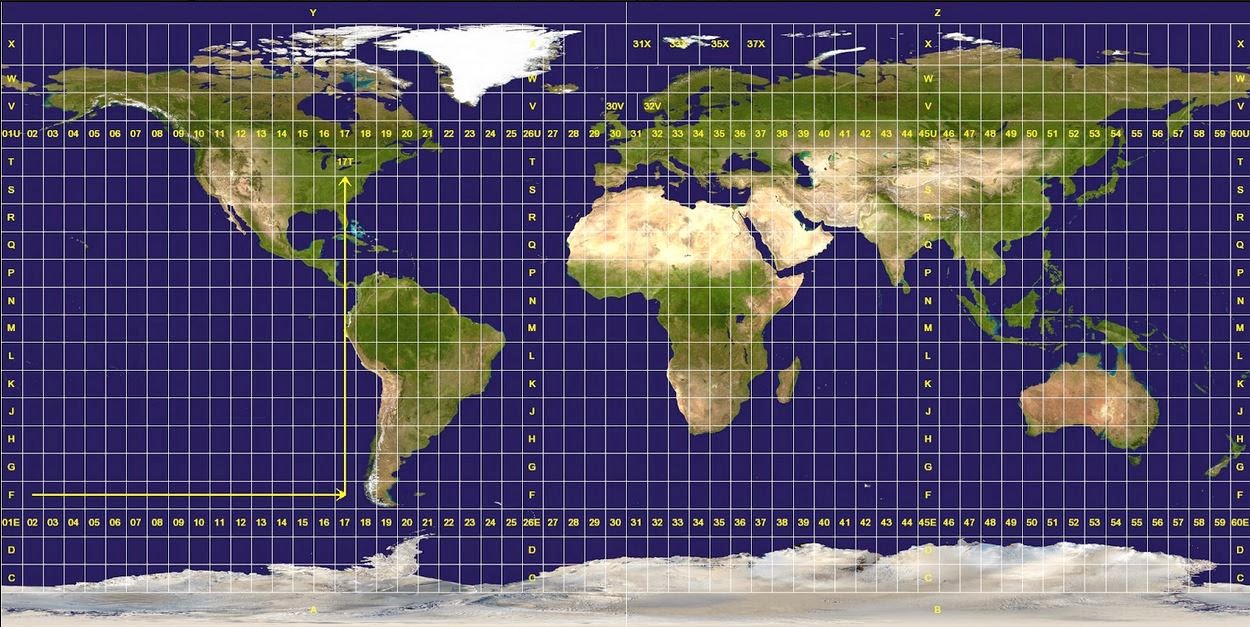 |
| Figure 1 shows the world divided up in the 60 zones of the UTM coordinate system. The Universal Transverse Mercator coordinate system is projected using a transverse Mercator projection. |
Methods
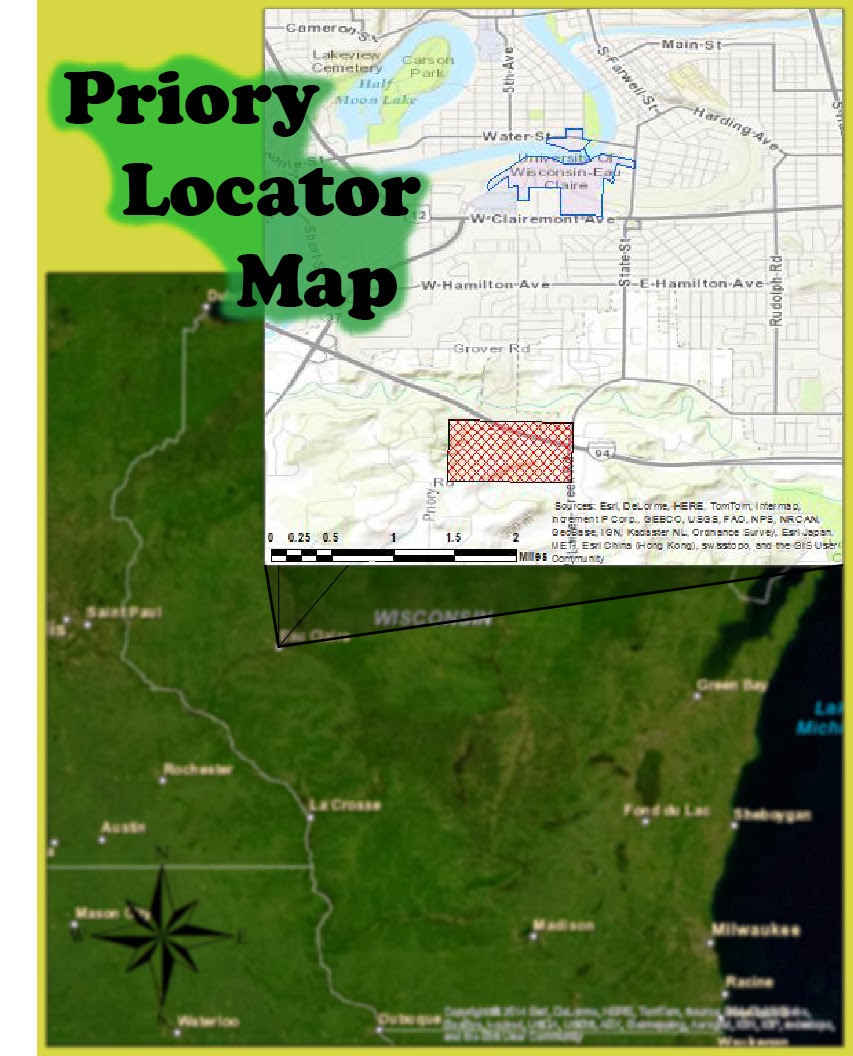
The Priory is a 112-acre parcel of land consisting of mostly wooded acres in the town of Washington, which is located three miles south of the UW-Eau Claire campus, Figure 2 shows its general whereabouts. The Priory also contains three building complexes totaling approximately 80,000 square feet; however, for our purposes the building's will only serve as areas to be avoided.For the actual activity we will us a map and compass to navigate the course. These tools will be essential to the method of distance/azimuth navigation (azimuth is referring to the angular measurement in a spherical coordinate system; on a compass it would refer to the degrees from magnetic north). Essentially if you know your location, you can use an angle with a distance to find another point. The map is used to find your location/the location of the place you want to be; and, the distance/azimuth can be interpolated from the map. Figure 3 shows an image of the compasses we used during our navigation, as well as some of the components on the compass.
Basics of Finding/Following a Bearing:
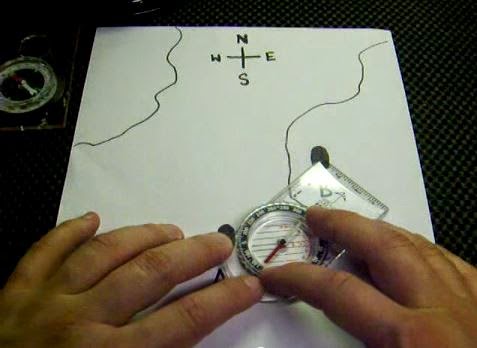
2) Orient compass dial to map North/True North, as shown in figure 5.
3) Record the bearing closest to the direction-of-travel line on the compass. This will be the bearing you will need to follow to reach your destination.
4) Keeping the compass at a comfortable chest height (preferably away from any metal objects), turn your body until the red end of the needle is in the red arrow/box on the compass. This position is often referred to as getting "red in the shed."
5) Now facing the same direction, turn the dial to the same bearing you just found.
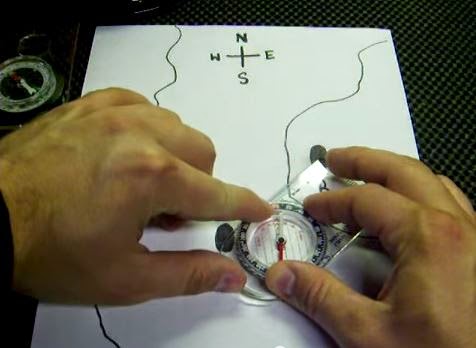
6) To reach your location, all you need to do is keep the red end of the needle in that red box and you will travel along that same line you drew from points A to B. Figure 6 shows a compass oriented to the map. Notice how the lines inside the dial are parallel to the grid lines on the map. This technique is helpful when trying to ensure the compass is oriented as accurately as possible to north on the map.
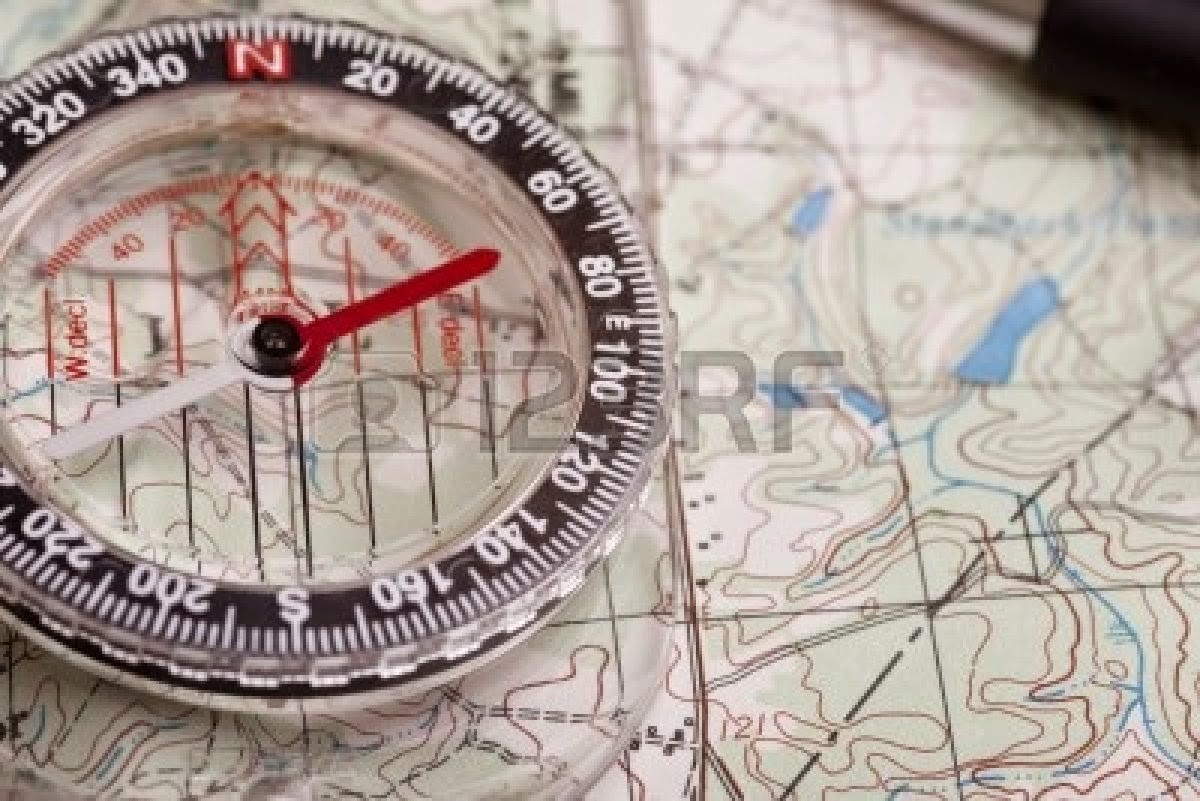 |
| Figure 6 shows a compass oriented to true north on a topographical map. |
Sometimes long distances between points must be traveled. In order to ensure you do not lose track of your pace count tools or strategies can be involved. One method is to break off a twig every 100 meters and put it in you pocket. There are also cheep tools such as beads on a string, shown in figure 7, which act as a counting mechanism.
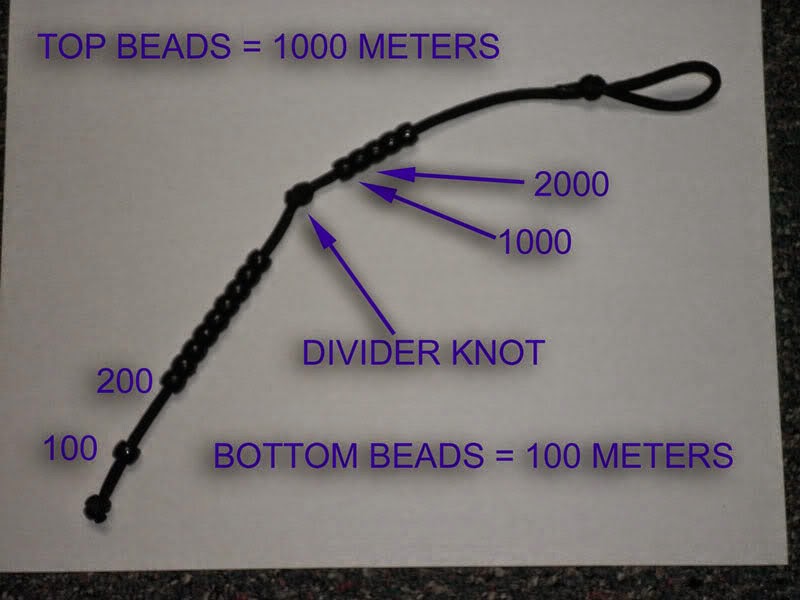 |
| Figure 7 shows a cheep tool which can help you remember the number of steps you have taken between you points. Once you reach your desired point you would reset the beads to zero. |
Discussion
This was a straight forward assignment, but it wasn't without its bumps. I couldn't figure out how to add a grid for the longest time. I knew it was in the data frame properties window under the 'grids' tab, but for some reason when I was creating the grids they would not show up. After some time playing around with the various tabs in the properties menu, looking in the 'Help' files, and trying to add new grids I figured it out. The units were not in meters and the intervals were set much too large to appear on the grid. Figure 8 shows the interface where I had my moment of clarity and fixed the necessary parameters.
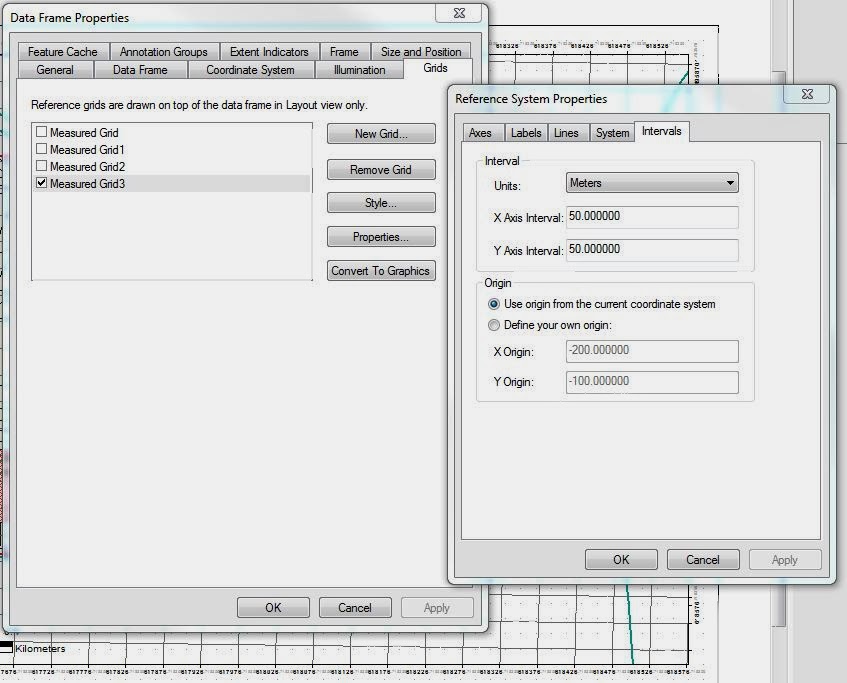 |
| Figure 8 The data frame properties menu. Here it is possible to add a grid in the layout view. For the navigation of the Priory, a 50 meter grid was decided to be of best fit. |
Another topic of debate was how many map elements would be necessary for an effective map. I have a personal fascination with elevation. I knew the DEM would be too much, but the elevation needed to be displayed since it would be an integral part of the navigation. Eventually I chose the 5 meter contour lines to best portray the lay of the land, yet freeing up the map from unnecessary clutter.
Additional map elements could have been added. Knowing where soft boggy areas are, poor footing along slopes, and other such areas would be helpful for navigating. Not all of these elements could be added without the need of a magnifying glass, but if there was a way to display them, navigation in the field could be improved. However, I have not yet been to the Priory course and lack the first hand experience of the terrain. With this limitation, the contours and the aerial images were the main tools I used and I could not ascertain such fine details from this small of a scale (1:4,500).
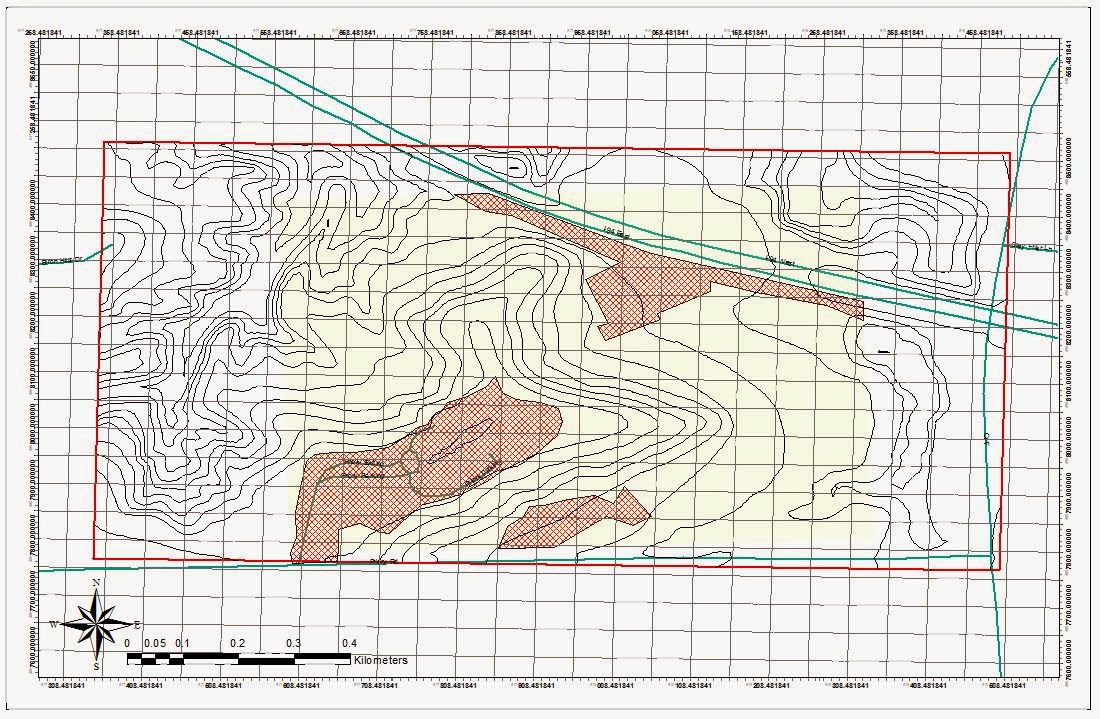
Figure 9 shows the final product for the map. A grid at 50 meter intervals was used, as well as contour lines at 5 meter intervals.

No comments:
Post a Comment